Documentation
Pixel Art Generator
Create stunning pixel art with our AI-powered generator. Sign up and simply enter a text prompt, and our AI will generate pixel art based on your description.
How to Use
-
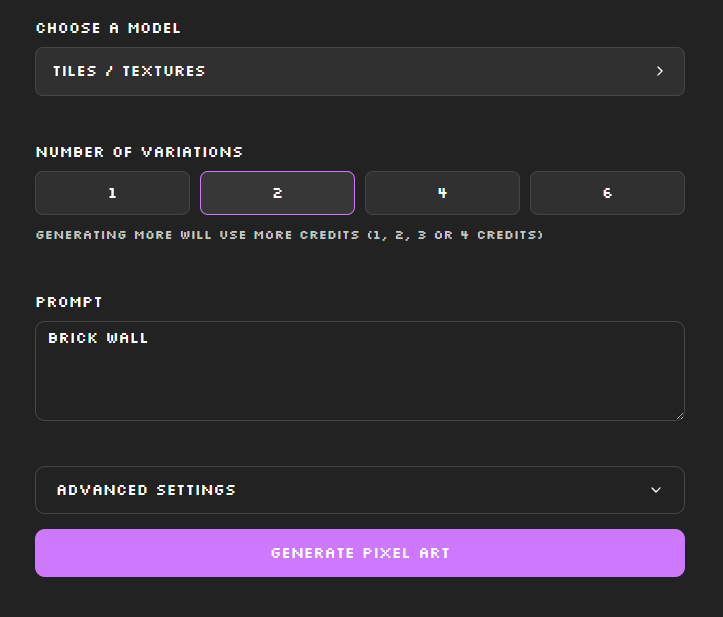
Choose a model
Click on the dropdown menu and choose the model you want to use for your pixel art.
Tiles / Textures: Generate seamless pixel art tiles in 32x32 size.
General: Generate other things like characters, items, objects or scenes in 64x64 size.
-
Number of variations
Click on the button of the amount of images you want to generate.
Please note: More variations cost more credits.
1 image --> 1 credit, 2 images --> 2 credits, 4 images --> 3 credits, 6 images --> 4 credits. -
Enter your prompt
Type a simple description of what you'd like to generate.
Example for "Tile / Textures" model: "Brick wall"
Example for "General" model: "Treasure chest with gold"
-
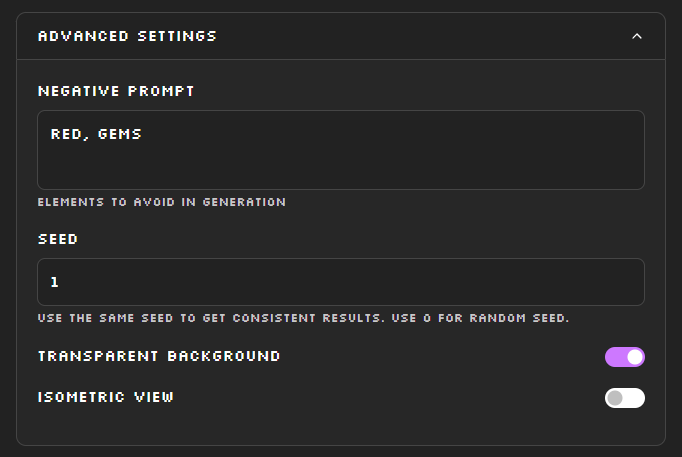
Configure Advanced Settings (Optional)
Click on "Advanced Settings" to customize your generation:
- Negative Prompt: Specify elements you want to avoid in the generation.
- Seed: Use a specific seed number for consistent results. Using 0 gives a random seed for the "General" model.
- Transparent Background: Toggle to remove the background (only for "General" model).
- Isometric View: Generate art with an isometric perspective (only for "General" model).
- Viewpoint: Select the viewpoint of the image (only for "General" model).
- Direction: Select in which direction the image is rotated. This is very useful for game characters. (only for "General" model).
-
Generate
Click the "Generate Pixel Art" button to start generating your image. This can take a minute.
-
Select a result and Download or Edit
Once generated, you can select a result and download your pixel art or edit it further using Edit Mode. Do this by hovering over the generated images.
Tips for Better Results
- For character designs, mention specific features like "armored", "with a cape", etc.
- Use the same seed to get similar results. Try different seeds to get different outcomes with the same prompt.
- Use the negative prompt to remove unwanted elements.
- Determine in which direction your character is facing by using 'direction' in the advanced settings.
Edit Mode
Fine-tune your pixel art with our built-in editor. Add details, adjust colors, or completely transform your generated art.
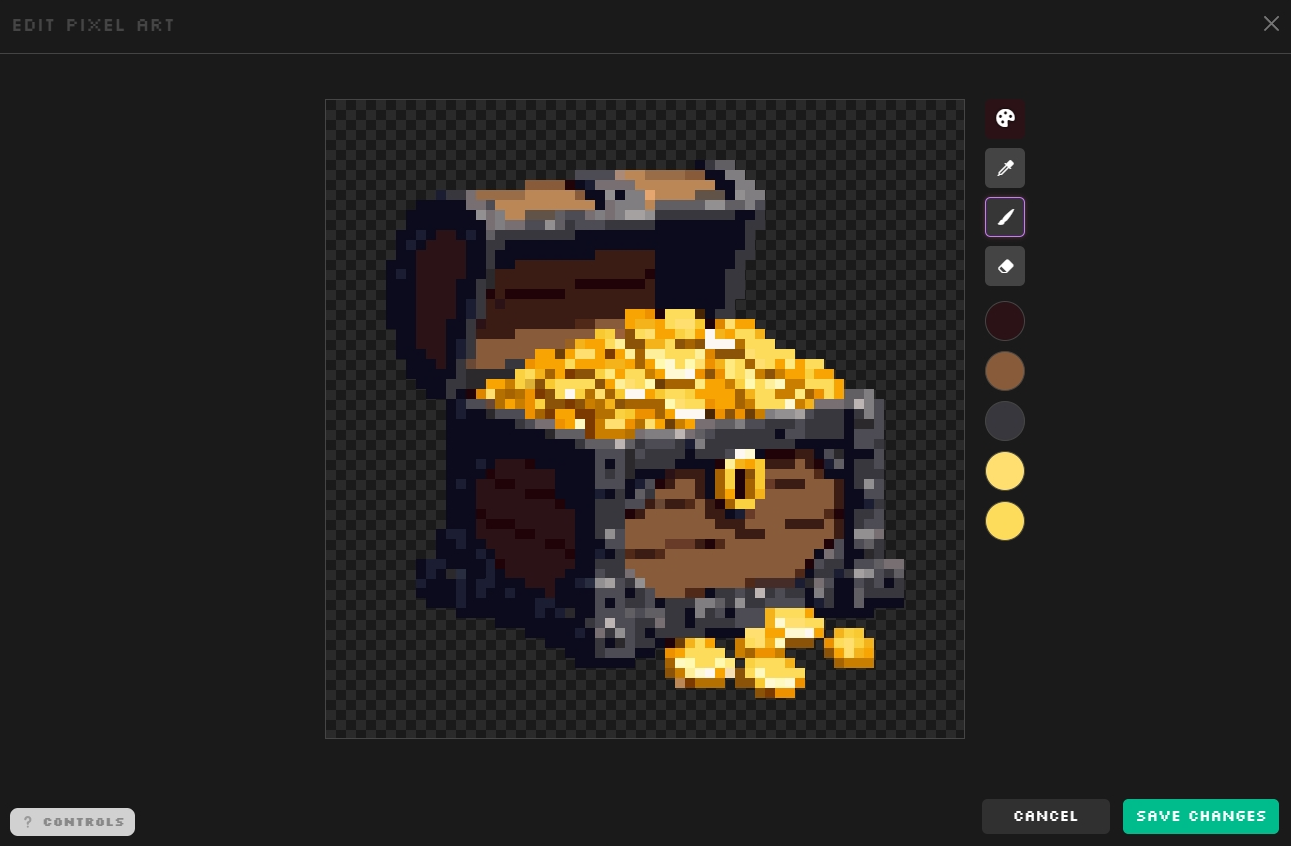
Tools and Controls
Paint Tool
Draw pixels with your selected color. Click the paint icon to activate.
Eraser Tool
Remove pixels to create transparent areas. Click the eraser icon to activate.
Color Picker
Select a color for drawing. Your recent colors will appear below for quick access.
Eye Dropper
Select a color from anywhere on your screen to use in your pixel art.
Keyboard and Mouse Controls
| Left Mouse Button | Draw with selected tool |
| Middle Mouse Button | Pan around the canvas |
| Mouse Wheel | Zoom in/out |
| CTRL + Mouse Wheel | Adjust brush size |
Tile Repeat Preview
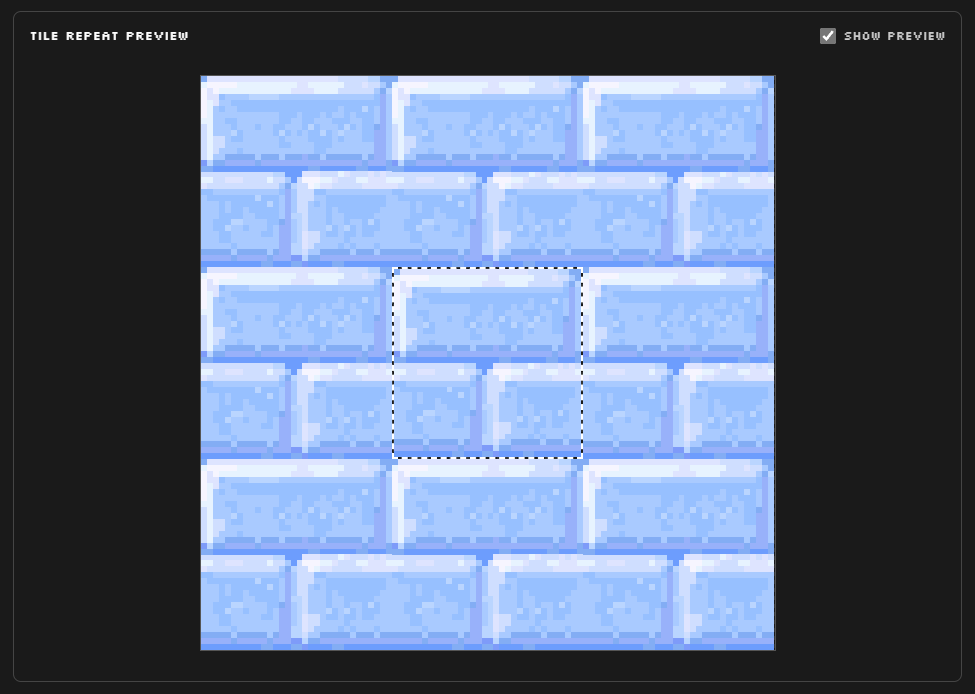
Enable this option when generating seamless tiles. It displays a preview with the image surrounded by copies of itself, making it easy to see whether the tile loops seamlessly.
Tips for Editing
- Use the zooming and panning features to work on fine details.
- When creating character sprites, use the eraser to create transparent areas for better game integration.
- Use the eye dropper tool to sample colors from your existing art for consistency.
- Remember to click "Save Changes" when you're done editing to apply your changes.
Image to Pixel Art
Transform any image into beautiful pixel art. Upload your photos or images, and our tool will convert them into pixel art style. This feature is completely free and requires no credits.
How to Use
-
Upload an Image
Drag and drop your image onto the upload area or click "Browse File" to select an image from your device.
Supported formats: JPG, PNG, GIF, WEBP, BMP & TIFF
-
Select Output Size
Choose the desired resolution (size) for your pixel art from the dropdown menu (e.g., 64x64, 128x128).
-
Generate
Click the "Generate Pixel Art" button to transform your image.
-
Adjust & Regenerate
Choose a different color palette or pixel art size for your pixel art and click "Regenerate Pixel Art" if you want to make any changes to the result.
-
Download
After conversion, you can download your pixel art. Choose "Use original size" in the download settings if you want to download in the small size you specified (e.g., 64x64, 128x128).
Tips for Better Results
- Use images with clear subjects and good contrast.
- Simple images with distinct features work best for pixel art conversion.
- Try different output sizes to find the best level of detail for your image.
- Transparent backgrounds are not supported (yet).
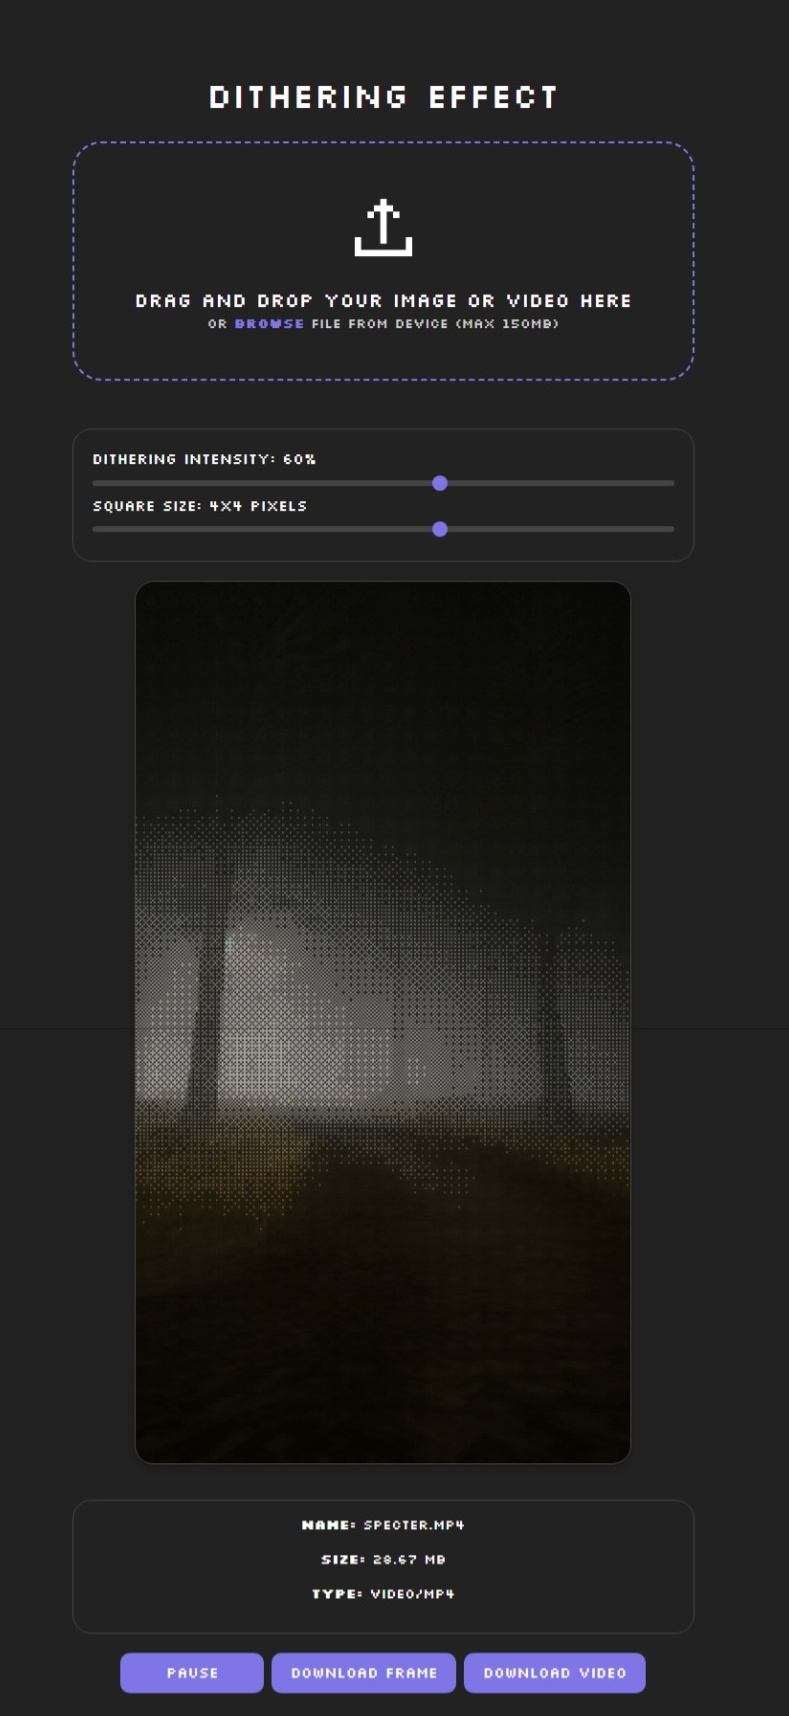
Dithering Effect
Apply a classic ordered (Bayer) dithering effect to images and videos to achieve a retro, pixel-art aesthetic. The tool supports still images for quick previews and downloads, and MP4 videos with live preview, playback controls, and MP4 export.
Supported Formats and Limits
- Images: JPG, PNG, GIF, WEBP, BMP, TIFF
- Video: MP4 (H.264/AAC)
- Max file size: 100 MB
How to Use
-
Upload an Image or Video
Drag and drop a file into the upload area or click “browse” to select from your device. The tool detects whether the input is an image or a video automatically.
After upload, file details (name, size, type) appear under “File Info”.
-
Adjust Settings
Adjust the dithering parameters to achieve your desired effect:
- Dithering Intensity: Controls the strength of the ordered dithering pattern (0–100%). Lower values are subtler; higher values produce a stronger, more dramatic pattern.
- Square Size: Pixel block size in the preview (1–6). Larger sizes create chunkier, more retro blocks; smaller sizes preserve more detail.
-
Export
Download Image: Exports the current dithered image preview as a file.
Download Video (WEBM): Available after uploading a video. Click “Download Video” to render and export the dithered video as WEBM file.Filenames are cleaned before saving so they don’t repeat the original extension in the exported name.
Video-Specific Controls
- Play/Pause: Pause the dithered preview with the Play/Pause button.
- Download Frame: Download the current frame of the preview as an image.
- Export to WEBM: Use “Download Video” to save the dithered result. Export time depends on video length and your browser/device performance.
Tips for Better Results
- High-contrast footage produces a more defined dithering pattern.
- For small social posts, a slightly larger square size can read better on mobile; for detailed shots, use smaller sizes.
- The preview runs at display resolution for smoothness; the exported WEBM uses the configured settings for a clean result.